
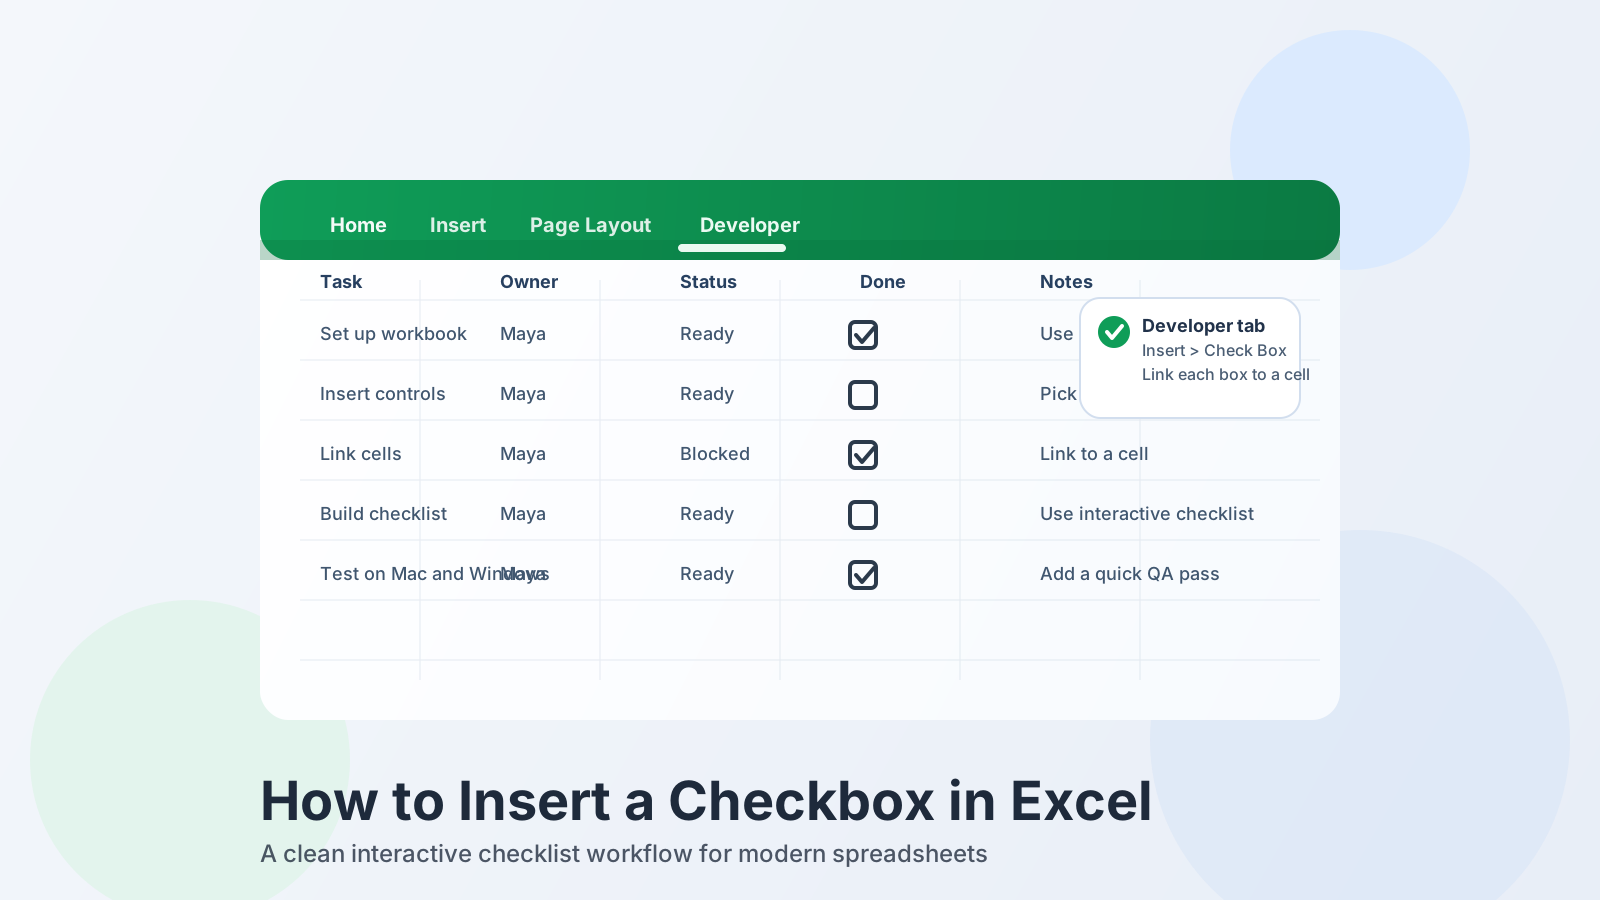
To insert a checkbox in current Excel for Microsoft 365, select the target cells and choose Insert > Checkbox. Excel adds an in-cell box that you can click on or off, making it the quickest route to an interactive checklist. You do not need the Developer tab for this modern feature.
Native checkboxes are ideal for a task tracker, packing list, or approval column because their checked state is data, not decoration. A tick box is simply another name for a checkbox. If Insert > Checkbox is missing in desktop Excel, the legacy Developer-tab method is a desktop-only fallback; legacy Form Controls cannot be used in Excel for the web.
Sourced stat A worksheet supports 1,048,576 rows and 16,384 columns, according to Microsoft Support’s Excel specifications and limits. That gives even a long checklist ample room; the useful question is which checkbox type your Excel version supports.
| Method | Where to find it | Best use |
|---|---|---|
| Native in-cell checkbox | Insert > Checkbox | Current Microsoft 365 lists, formulas, and conditional formatting |
| Legacy Form Control | Developer > Insert > Check Box | Older/perpetual desktop versions or existing legacy desktop workbooks; unavailable in Excel for the web |
| Yes/No drop-down | Data > Data Validation | Typed text choices instead of a clickable box |
Insert a native checkbox in Excel 365
For Microsoft 365 on Windows, Mac, or the web, select the target cells and choose Insert > Checkbox. Microsoft Support documents just 2 insertion steps: select the range, then choose the command. Excel places a native checkbox in every selected cell, with no Developer tab required.
- Put your tasks in one column, such as A2:A10.
- Select the cells that should hold the boxes, such as B2:B10.
- On the ribbon, choose Insert.
- Select Checkbox.
- Click any box to switch it between unchecked and checked.
The checkbox lives in the cell you selected. That makes it easier to fill, copy, sort, and filter alongside ordinary worksheet data than the floating controls used by older Excel versions. If you only need one box, select one cell before choosing the command. For a checklist, select the entire range first.
Microsoft’s Using check boxes in Excel guide uses this same range-first workflow. If Checkbox is missing from the Insert tab in desktop Excel, skip ahead to the Developer-tab instructions. In Excel for the web, legacy Form Controls are not a fallback; use native in-cell checkboxes when available or open the workbook in desktop Excel.
Make the checkbox column an interactive checklist
Native Excel checkboxes make an interactive checklist because each cell evaluates to TRUE when checked and FALSE when unchecked. Microsoft documents that a worksheet can contain 1,048,576 rows, so the pattern can scale well beyond a short to-do list while keeping the input column simple and readable.
Start with task names in column A and native checkboxes in column B. In C2, add a friendly status label:
=IF(B2,"Done","Pending")Fill the formula down the column. Because the box itself returns TRUE or FALSE, you do not need a hidden helper cell or a manual link for the modern control. You can count completed tasks with:
=COUNTIF(B2:B10,TRUE)To show completion as a percentage, use:
=COUNTIF(B2:B10,TRUE)/COUNTA(A2:A10)Format that last cell as a percentage. For a more visual result, select your task rows, choose Home > Conditional Formatting > New Rule, and use a formula such as =$B2=TRUE. Apply a muted fill or strikethrough so completed work is easy to scan without hiding the original task name.
Native checkboxes also work neatly with filters. Turn your range into a table with Ctrl+T on Windows or Command+T on Mac, then filter the checkbox column to show TRUE or FALSE. That is useful when a long list needs a quick “show only unfinished tasks” view.
If you are building a reusable template, add a clear heading above the checkbox column—Complete, Done, or Reviewed all work well. Avoid putting both a checkbox and a second manual Yes/No field in the same row, because the two values can disagree. Let the checkbox be the input, then generate any text status from its TRUE/FALSE value.
For a compact progress summary, place =COUNTIF(B2:B10,TRUE) in a cell above the list and label it Completed. Next to it, use =COUNTA(A2:A10) for Total tasks. Those two values make the checklist useful at a glance without requiring a separate dashboard. Expand the ranges as your list grows, or use table references so the formulas grow automatically.
Use the Developer tab for legacy Form Control checkboxes
Use a Developer-tab checkbox only in desktop Excel when Insert > Checkbox is unavailable or an older workbook already uses Form Controls. Microsoft Support says these controls are added 1 at a time and cannot be used in Excel for the web. Each floating desktop control needs positioning and its own cell link before formulas can use its state.
This is the usual path for a perpetual-license or older desktop build that does not include native in-cell checkboxes:
- Choose File > Options > Customize Ribbon on Windows.
- Under Main Tabs, check Developer, then choose OK.
- Open Developer > Insert.
- Under Form Controls, choose Check Box.
- Click the worksheet where you want the control to appear.
The control is an object that sits over the grid rather than inside a cell. You can right-click its label to edit or remove the caption, then drag it into place. Copy the finished control down a column only after you have checked its link—copied legacy controls can otherwise keep pointing at the wrong cell.
On Mac, ribbon labels and options can vary slightly by Excel release. The key distinction remains the same: try Insert > Checkbox first in a current build; use Developer > Insert > Check Box when working with the legacy Form Control path. This is a compatibility choice, not the default workflow for Microsoft 365 users.
Legacy controls are still a sensible choice when an established workbook already links form controls to formulas, macros, or a dashboard. In that case, replacing every object with native checkboxes could alter references that other users depend on. Keep the legacy pattern consistent, document the linked-cell column, and test one copied row before changing a whole workbook.
Link a legacy checkbox to a cell
In desktop Excel, legacy Form Control checkboxes need a cell link for formulas, counts, or formatting. Microsoft Support distinguishes 2 worksheet control types: Form Controls and ActiveX Controls; this guide uses the former. Right-click the checkbox, open Format Control, and set its Cell link to an unused cell that exposes its state.
After you insert the control, right-click it and choose Format Control. Open the Control tab, click the Cell link box, and select a cell such as C2. Choose OK, then click the checkbox once to confirm that C2 changes when the control changes.
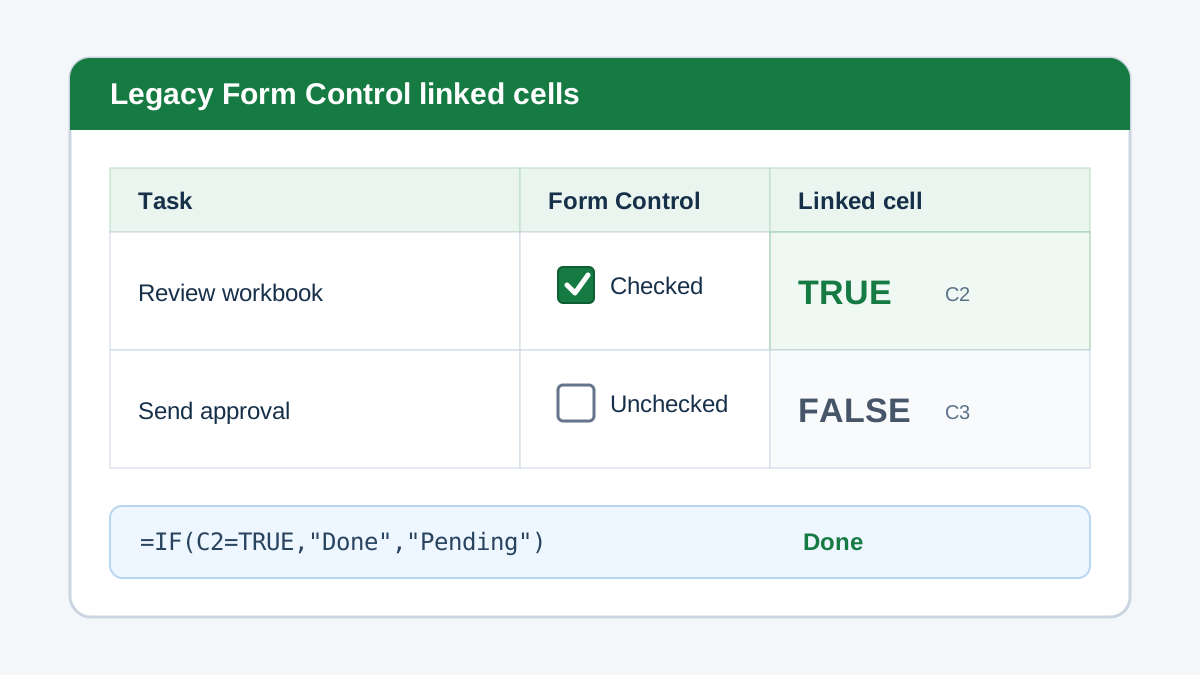
Each legacy checkbox has its own linked cell, producing a clean two-state TRUE/FALSE result for formulas.
You can now use the same formulas as a native checkbox workflow, but reference the linked cell instead:
=IF(C2=TRUE,"Done","Pending")For a column of legacy controls, link each one to its own row: C2 for the first box, C3 for the second, and so on. Keeping the helper column beside the tasks makes the setup easier to audit. Hide that column later if the worksheet only needs to show the checkbox and a readable status.
One practical check prevents many mistakes: click each box while watching its linked cell. If the value does not change, the checkbox may look correct but your formulas will not update. Fix the link before copying the setup through the rest of the checklist.
Copy, format, and troubleshoot Excel checkboxes
Native checkboxes can be copied, filled, and formatted like cell values; legacy Form Controls must be handled as objects. That difference explains most checkbox problems. Microsoft Support lists Excel’s 16,384-column worksheet limit, but a clean two- or three-column checklist is usually clearer than spreading controls and helper cells across the sheet.
For native boxes, select the cell and drag the fill handle, copy and paste, or select a range before using Insert > Checkbox. Use a narrow checkbox column next to a wider task-name column. If a box is hard to see, increase row height rather than adding a text label that repeats the task name.
For legacy boxes, align the first control carefully, copy it, and verify every cell link. A legacy checkbox is not cell content, so sorting rows can be risky if the objects are not configured to move and size with cells. Right-click the control, choose Format Control > Properties, and select the placement behavior that fits your workbook before sorting or filtering.
If you run into trouble, work through these fixes:
- No Checkbox command on Insert: in desktop Excel, use a current Microsoft 365 build if available or follow the Developer-tab Form Control path. Excel for the web cannot use legacy Form Controls.
- A native box does not affect a formula: check whether the formula refers to the checkbox cell and tests for TRUE.
- A legacy box does not affect a formula: reopen Format Control and correct the Cell link.
- Copied legacy boxes all report the same result: assign each control a different linked cell.
- Checkboxes drift after sorting: use native in-cell boxes, or set legacy object properties before sorting.
For shared workbooks, ask one collaborator to test the completed file in the Excel version they actually use. A checkbox that looks correct on the author’s desktop can still be confusing if a teammate opens an older build without the native command. A short note at the top of the sheet—such as “Requires Microsoft 365 for in-cell checkboxes”—prevents avoidable support questions.
Choose a checkbox, drop-down, or option button
Choose a checkbox for an independent yes-or-no decision, a drop-down for text choices, and option buttons when exactly one choice is allowed. This small rule keeps data entry predictable. Microsoft Support lists 1,048,576 rows per worksheet, but compact, consistent controls matter far more than raw sheet capacity for everyday users.
A checkbox is right when several items can be true at once: several tasks can be complete, several permissions can be selected, or several documents can be approved. A drop-down is better when the choices are words such as Yes, No, and Not Applicable. See Excel Yes No Drop Down for that text-based approach.
Option buttons suit a single answer from a group, such as Basic, Standard, or Premium. Selecting one option button clears the others, which is why they should not replace a multi-item checklist. Our guide to Excel Option Button Controls shows where that control fits.
For an interactive checklist, choose native Insert > Checkbox whenever it is available. It gives users a direct click target and gives formulas a clean TRUE/FALSE result. Choose a Developer-tab checkbox only in desktop Excel when version support or an existing legacy workbook requires it; Excel for the web cannot use legacy Form Controls.
Frequently asked questions
These answers separate the current checkbox feature from the older Form Control workflow. Microsoft Support documents 2 values for every native checkbox—TRUE and FALSE—so formulas can use the cell directly. Start with Insert > Checkbox; use the Developer tab only in desktop Excel when that command is unavailable or legacy compatibility requires it.
How do I insert a checkbox in Excel the fastest way?
In current Microsoft 365 Excel, select the cells where you want boxes, choose Insert, then select Checkbox. Microsoft Support documents this as a 2-step process: select the range, then choose Insert > Checkbox. Excel adds a clickable checkbox to every selected cell; no Developer tab is required.
Do checkboxes in Excel need the Developer tab?
No—not in current Microsoft 365 Excel. Microsoft Support documents 2 checkbox paths: native Insert > Checkbox and the legacy Form Control route. Use the Developer tab only in desktop Excel when Insert > Checkbox is unavailable or a workbook specifically needs the older control type; legacy Form Controls cannot be used in Excel for the web.
What is the difference between a checkbox and a tick box in Excel?
There is no functional difference. Tick box is another name for checkbox, particularly outside the United States. Microsoft Support documents the same 2 underlying values for a native checkbox: TRUE when checked and FALSE when unchecked.
Can I make an interactive checklist with Excel checkboxes?
Yes. Native in-cell checkboxes evaluate as TRUE or FALSE, so you can count completed items, display a Done or Pending label, and use conditional formatting without a separate cell link. Microsoft Support lists a worksheet capacity of 1,048,576 rows.
When should I use a Developer tab checkbox instead?
Use the Developer tab’s Form Control checkbox only in desktop Excel if your desktop version does not offer Insert > Checkbox, or if you are maintaining an older workbook built around linked controls. Microsoft Support says Form Controls must be added 1 at a time and cannot be used in Excel for the web; link each desktop control to its own cell before using it in formulas.
The practical takeaway is simple: use Insert > Checkbox for modern Excel 365 checklists, then use the checkbox cells directly in formulas. Keep the Developer tab in reserve for legacy Form Controls in desktop Excel, where a cell link is part of the setup; those controls cannot be used in Excel for the web.
