
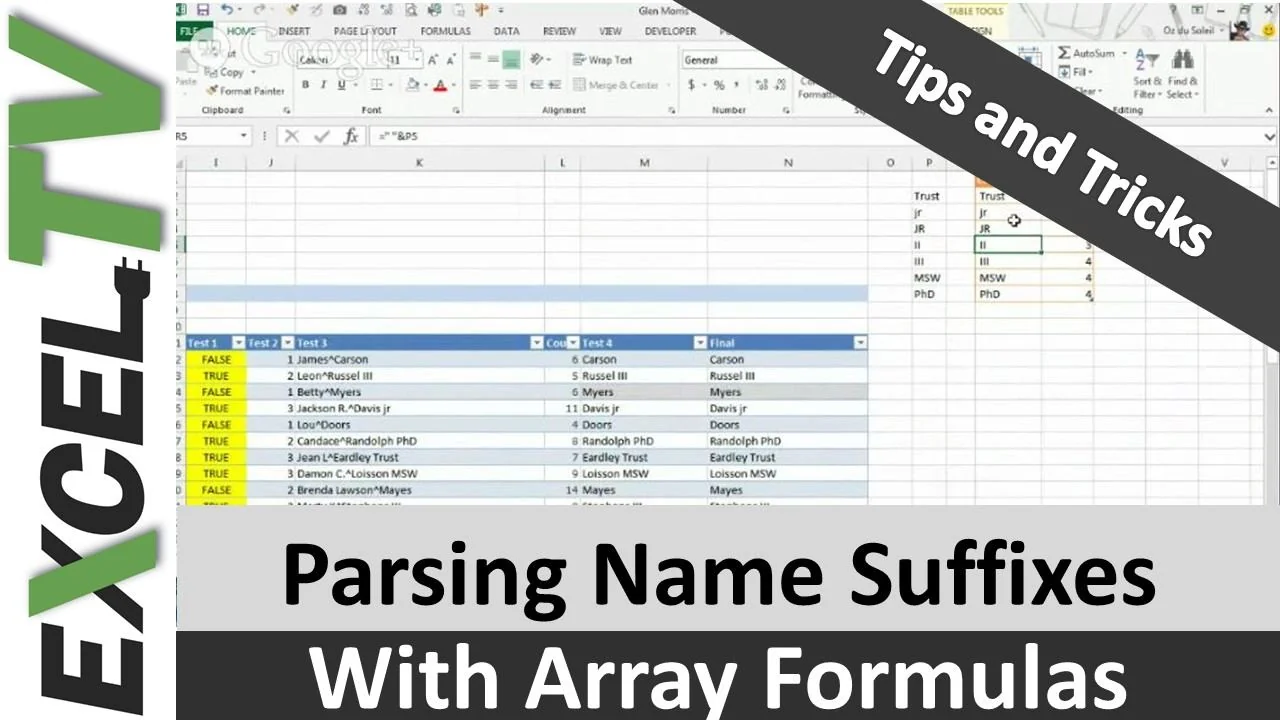
To sort names by last name, use a suffix list and helper columns to locate the surname boundary, then sort by the Result column. The Result key retains endings such as Jr. and PhD rather than removing them, while TRIM handles stray spaces and the legacy array-formula method keeps older workbooks compatible.
Key takeaway
- Use a suffix list so Excel does not mistake Jr., PhD, or similar endings for the last name
- Helper columns make the formula easier to audit and troubleshoot
- This method is especially useful in older workbooks that need to stay compatible
 Create a List of Suffixes
Some last names may be followed by suffixes such as “Jr.” or “PhD”. It is important to make sure that EXCEL does not pick them up as the last names of an individual. So, the first (and the only manual step) is to create a list of suffixes present in the list of names you want to sort.
If your source names also have uneven spacing, fix that first with TRIM so the suffix check starts from clean text.
Note that suffixes are those which follow the last names with a space in between!
 Create a Table of Suffixes
Now, go to Insert > Table and select the list and two more columns on its right.
Let’s name the columns from left to right: New Suffix, Sfx with Space and Count Characters.
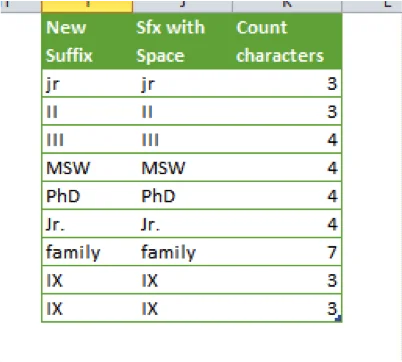
Now insert the formula =" "&[@[New Suffix]] in the second column of the table and =LEN([@[Sfx with Space]]) in the third column.
You should be able to see that the column titles correspond with what these formulae are doing.
 Detecting a Suffix
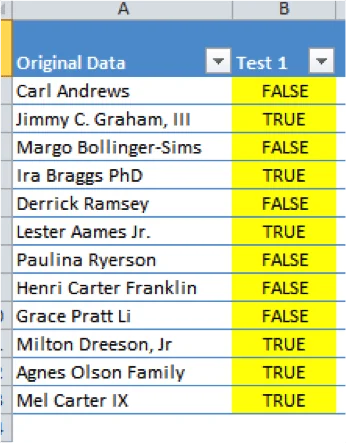
Now, create a 6 column table (Insert > Table) with your original data on names in the leftmost column. The columns should be named from left to right as follows: Original Data, Test 1, Count Spaces, Replace, Delimiter and Result.
Go to the first cell in the Test 1 column. Now apply the formula =OR(RIGHT(x,y)=z). The letters x, y, and z are placeholders for the references described below; do not type them literally.
X is selecting the left cell.
Y is selecting the Count Characters column from your suffixes table (without the header).
Z is selecting the Sfx with Space column from your suffixes table (without the header).
Once you’re done putting in the formula, press Ctrl+Shift+Enter. This should give you an output which looks like the picture on the right.
 Getting to the Last Names
It’s time to speed things up now!
In the Count Spaces column, first cell, enter the following formula:
=LEN([@[Original Data]])-LEN(SUBSTITUTE([@[Original Data]]," ",""))
And press Ctrl+Shift+Enter.
Enter the following formulae using the same method as well:
Replace
=IF([@[Test 1]]=TRUE,SUBSTITUTE([@[Original Data]]," ","^",[@[Count Spaces]]-1),SUBSTITUTE([@[Original Data]]," ","^",[@[Count Spaces]]))
Delimiter
=FIND("^",[@Replace],1)
Result
=RIGHT([@Replace],LEN([@Replace])-[@Delimiter])
If you want another cleanup example that breaks text apart more directly, see how to split cells in Excel. And if this naming work is part of a broader standardization pass, review Excel file naming conventions and name style rules before you publish the workbook.
And you are done! You should now have the last names in the rightmost column now.
Now Sort Them!
Sort the table by the Result column to put the names in last-name order while keeping each full record together.
What’s Next?
Use this the next time you need to do some tricky sorting. Share it. If you want to compare this legacy workaround against a more modern lookup pattern, read the Excel XLOOKUP guide or check the XLOOKUP vs VLOOKUP comparison.
